I bought BlogStomp a while back just for the sheer fact of making my life easier. Being able to batch resize and create collages / 2-ups in minutes was enough for me to invest the $50. BlogStomp has become an essential part of my workflow BUT I didn’t realize I have been missing out on a huge feature BlogStomp offers. A few days ago I decided to mess around in the Blog tab in BlogStomp. This is a hidden gem that I feel gets over looked. What I found was that I could link my WordPress site to the blog tab and actually post pictures and blog posts directly from BlogStomp. Now this is cool and all but I know you can do something similar to this in Microsoft Word. The cool feature comes in under the SEO feature. I have always been a Lightroom user. The features it offers are way easier to use and makes my workflow a breeze. I could go on all day why I choose Lightroom over Photoshop, but that’s a post for another day. Lightroom gives you the ability to keyword your images for cataloging and local searching. Which is kind of helpful but not really necessary. Here’s where it gets interesting. If you use the keyword tab in Lightroom, these keywords can be imbedded into the exported image. Now we’re getting to the good stuff. If you use that keyword tab to write a brief description of the photo or even adding a few keywords, then exporting the images to use in BlogStomp, you can tell BlogStomp to use those keywords as what’s called ALT Tags. Whats an ALT TAG?
“An alt tag is a text alternative for an image or object on your page. The alt tag will be read by screenreaders and other site readers (SUCH AS GOOGLE) as an alternative to the image itself.They are important because they make sure that the content of your site is easy to understand and available to everyone who wants to view or read it.”
All that to say, Google really likes seeing the ALT tags. Within moderation! Do not be super redundant and put things that don’t pertain the the image in this ALT tag. This will make your SEO worse. Before I found this feature I found a hand full of Wordpress plug-ins claiming they do this same thing, but none of them really work right. So let me show you how to do this.
First thing you need to do is prep your image in Lightroom. In the keywording tab, add a few keywords. Do not just stuff this full of keywords like; Tree, outdoors, baby, flower girl etc. Short, sweet and to the point. 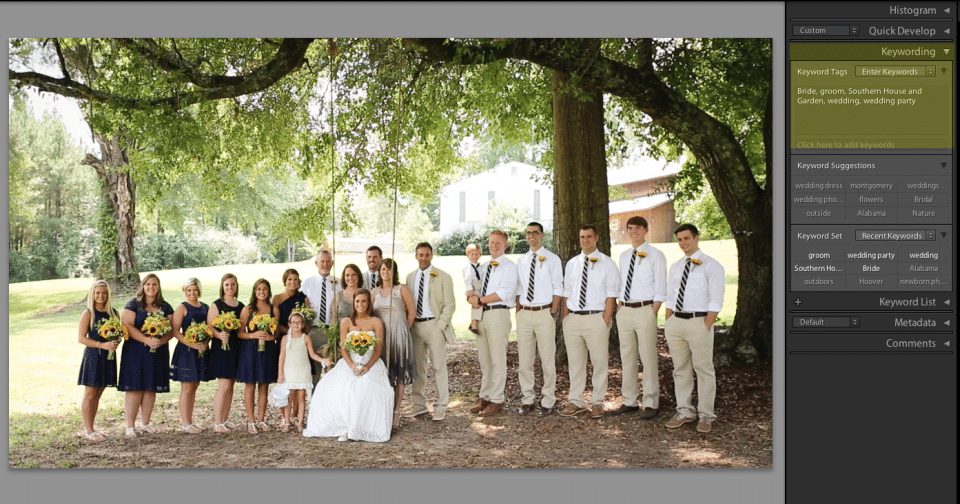
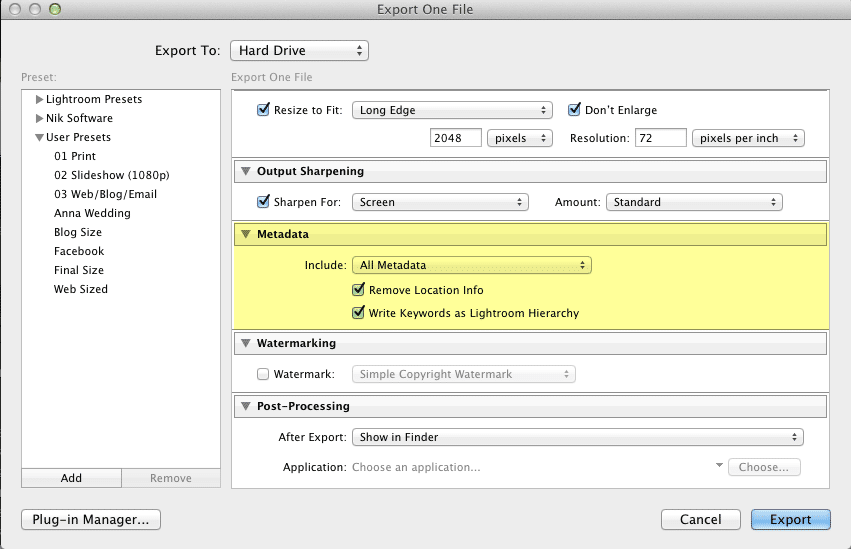
Next export your image and make sure you select “All Metadata” and check “Write Keywords as Lightroom Hierarchy.” After you’ve done that, export your image.
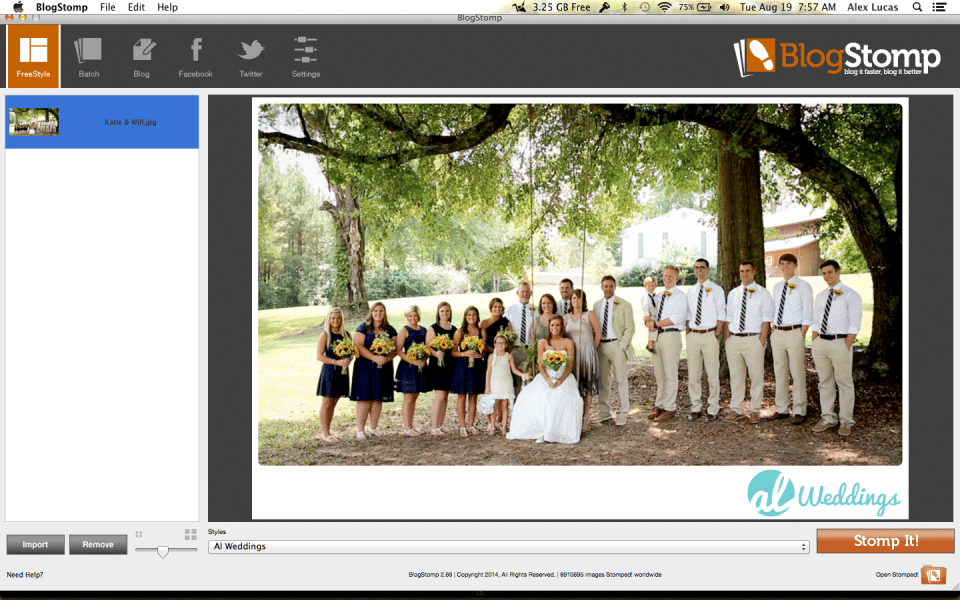
Now open BlogStomp and Stomp your image as normal.
Once your image is Stomped, open the Blog Tab. NOTE: If this is your first time using the blog tab you will have to log into your website from BlogStomp.
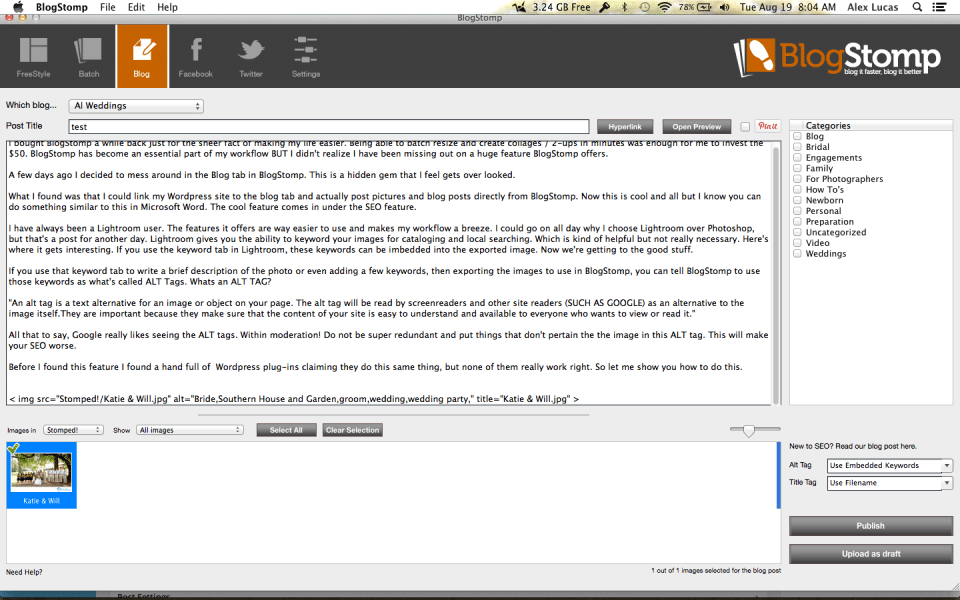
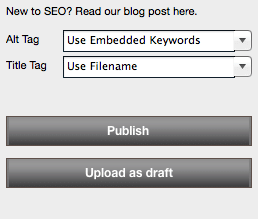
Here’s the key! Make sure you do this. Next to Alt Tag select “Use Embedded Keywords” and for Title Tag, “Use File Name.” As you can see from the image above ” img src=”Stomped!/Katie & Will.jpg” alt=”Bride,Southern House and Garden,groom,wedding,wedding party,” title=”Katie & Will.jpg” Your alt tag now has your keywords.
And that it. Not that hard, but adding alt tags AND a good image title will go a long way in helping your SEO. If you are interested in buying blog stomp I found a promo code that works on line “2PEOPLE1LIFELOVESBLOGSTOMP” its only 5% off but it’s something.
Hope it helps,
-Alex


4 Comments
What about the new export settings in LR?
It doesnt change a thing =)
You are my aspiration, I have few web logs and rarely run out from post
:).
Awesome tip and thanks for sharing! I’ll be implementing it right away! 🙂