If you’re like me, you want to do everything as efficiently as possible and do things quickly so you can move on to the next task. This is my method for organizing and exporting photos for my wedding clients. Using this lightroom export plugin and workflow has saved me tons of time. It also lets me automate some of my tasks so I dont have to sit with my computer. I can click export and go to bed.
Let me know what you think in the comments below.
1: I cull everything in PhotoMechanic. I mentioned this in my last blog on speeding up workflow. Lightroom just can’t handle culling or importing. It’s WAY too slow. So if you’re not using PhotoMechanic, I highly recommend you try it. After I cull the photos and give all the “keepers” 1 star. I will then create a Keepers folder to put all the 1-star photos inside. Then I’ll import to Lightroom.
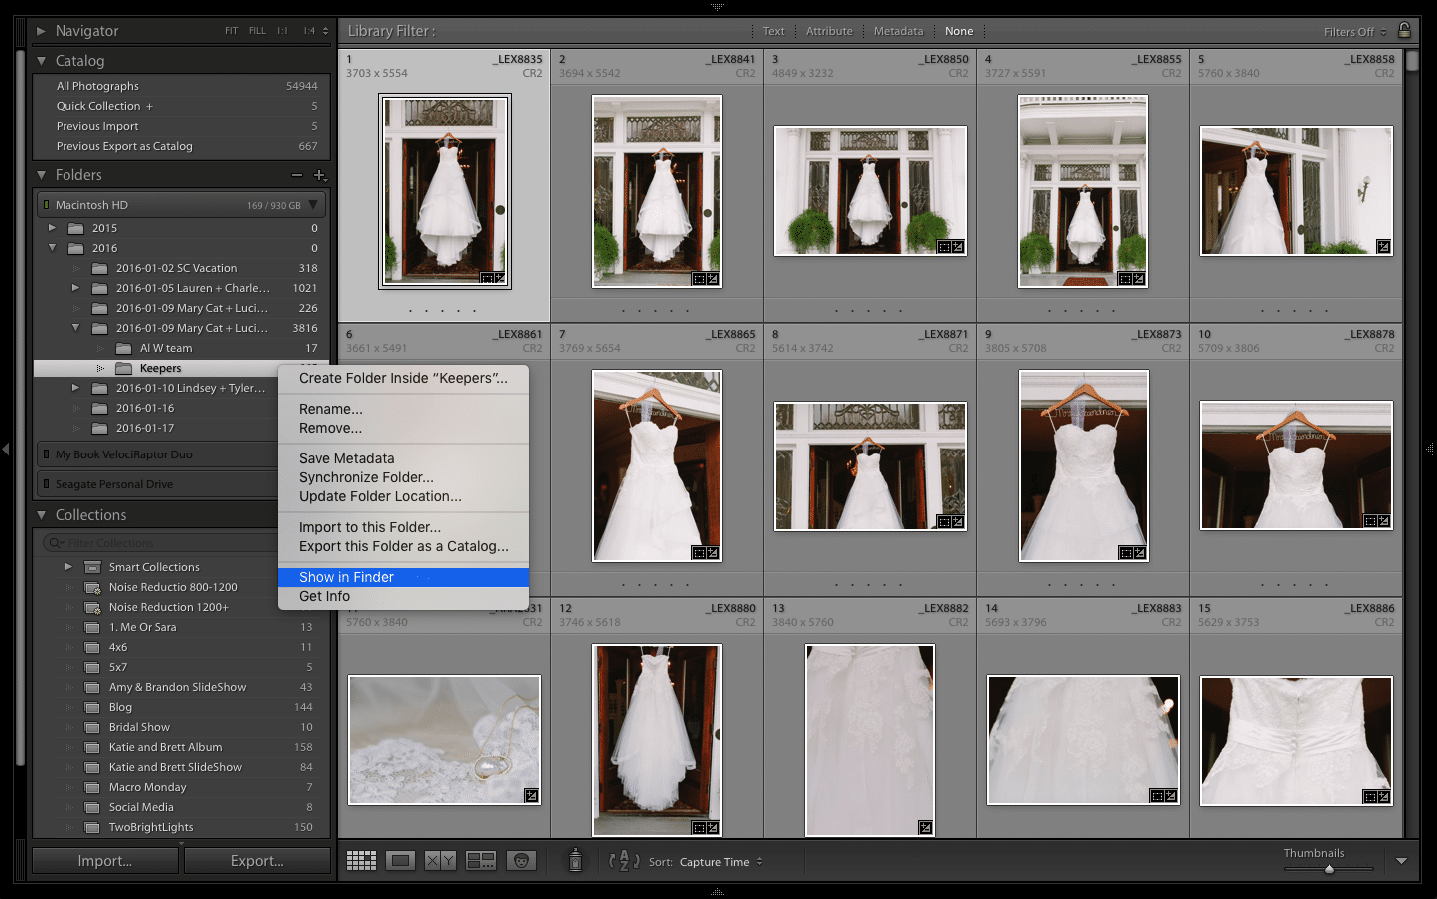
2: I also have a folder template that I use for every wedding (Download my template here). I use these folders to organize the final photos for the client. That way they can go directly to the folder for the ceremony and not have to look through 800 photos to find the ones they want. If you’ve tried to do this inside of Lightroom, you know it can be time-consuming. Those of you who’ve read my past blogs you know that I hate doing the same thing twice. With my folder template created I just copy and paste that folder set into the Keepers folder.
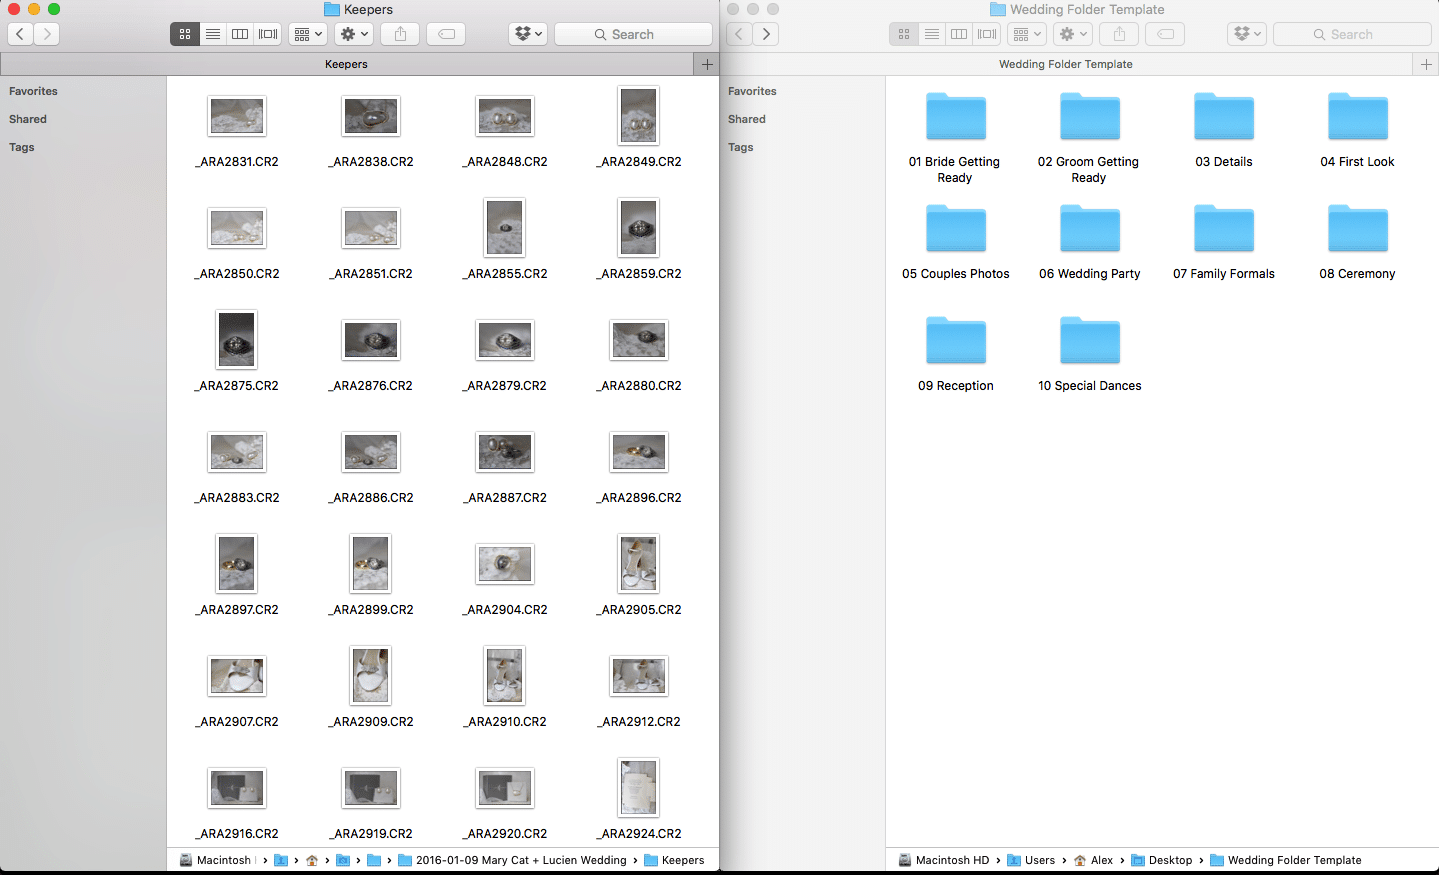
3: Once you have copy and pasted your folder template into your Keepers folder you then have to let Lightroom know that you made changes to that folder. You do this by right clicking on your Keepers folder and selecting “Synchronize Folder.” What this does is tell Lightroom to check for changes made behind it’s back, so to speak.
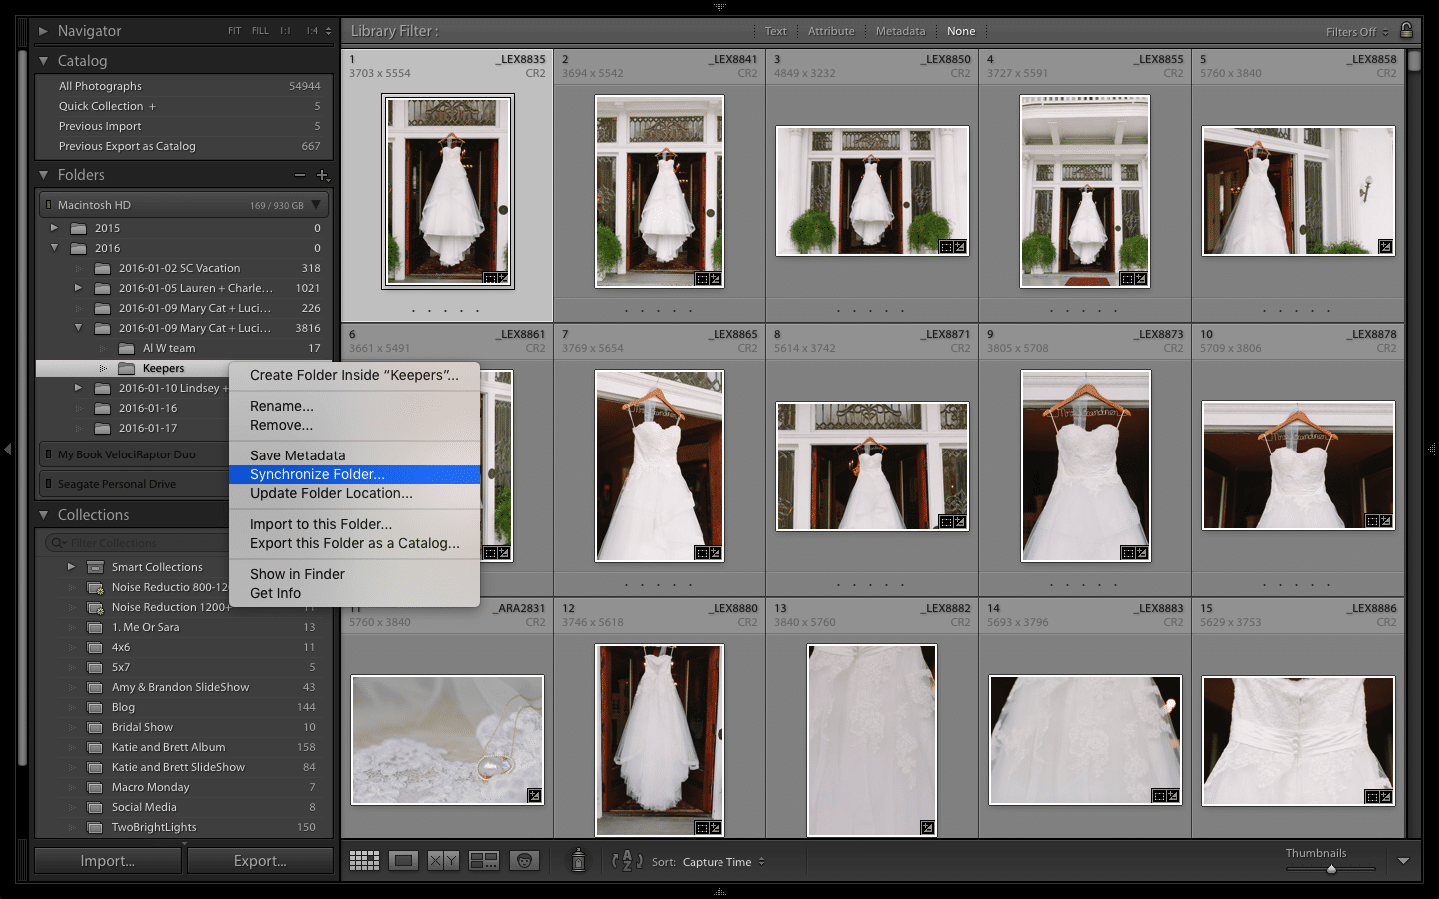
There’s a little trick you have to do in order for Lightroom to import the folder. Something has to be inside the folder for it to see a new change. So I put my print release in each folder. That way my client has to see it when they open their gallery. You can put whatever you want in there. You can delete it after the import if you want.

4: After that you should now have all of your template folders synchronized inside of Lightroom. 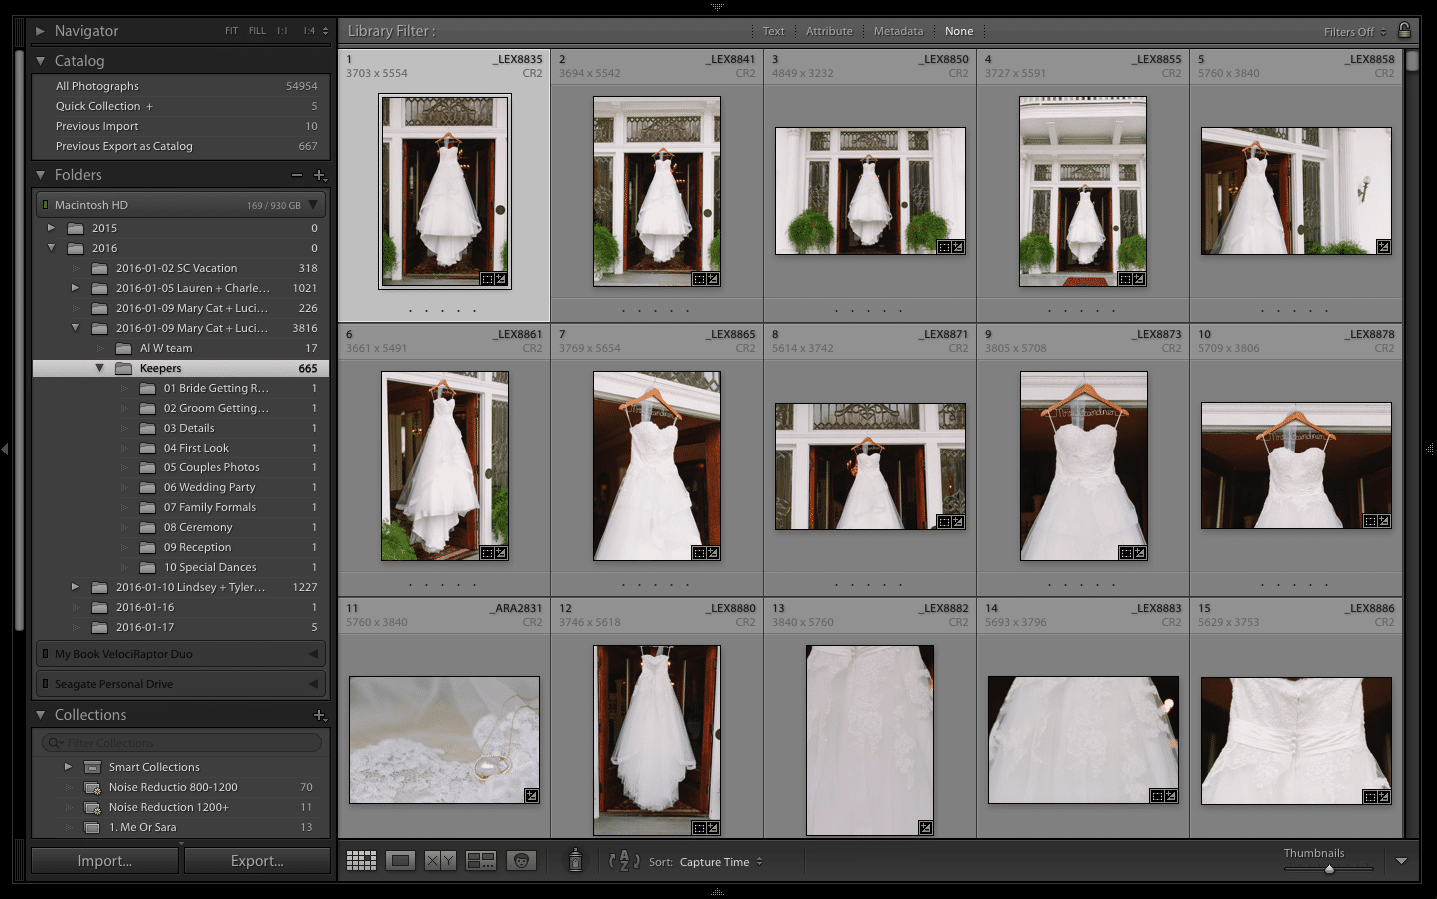 From there I will put all the photos in their correct folder. Tip for those of you who use second shooters, it’s easier to open you Library Filter by hitting the backslash “ \ “ key and you’ll see it toggle at the top of your grid tab. I go through each lens and sort the photos taken by each lens. What this does is let me select a larger range of images from the same scene. For instance, Sara could be shooting Bridal details at the same time I’m photographing the groom. So there would be some overlap when sorting the photos. If you shoot with the same lenses then you could use the sort by Camera serial number instead of lens.

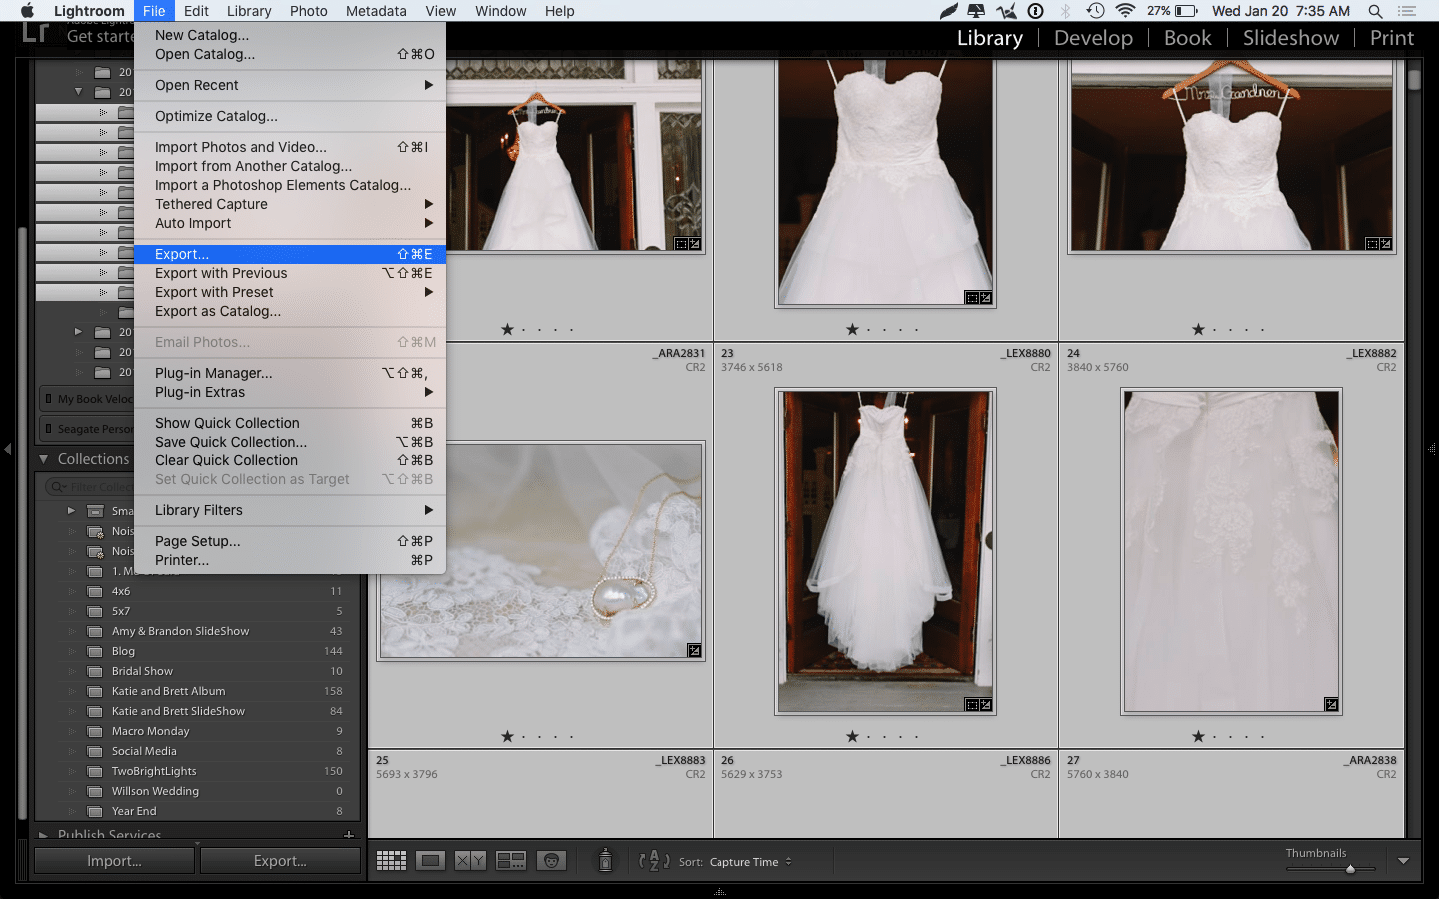
5. You have now edited all your photos and it’s time to export. Go to File > Export (cmd / ctrl + Shift + E). I use a Lightroom plugin called LR/TreeExporter to export all my folders and photos at once. Without this plugin, Lightroom will only export the photos and you have to type out the folder you want it to export too. For instance, I want to to export all the photos in “01 Bride Getting Ready” and “02 Groom Getting Ready.” Of course, I want the photos to be exported into their correct folders. So without the plugin I have to go to the export screen and Choose a new folder to export into, Name it “2016-01-09 Mary Cat + Lucien Wedding,” then select Put photos in Subfolder, and then type out the folder name. I have to do this for each separate folder. That’s 4 extra steps and I have the do the 4th step 10 times. NO NO NO!!!
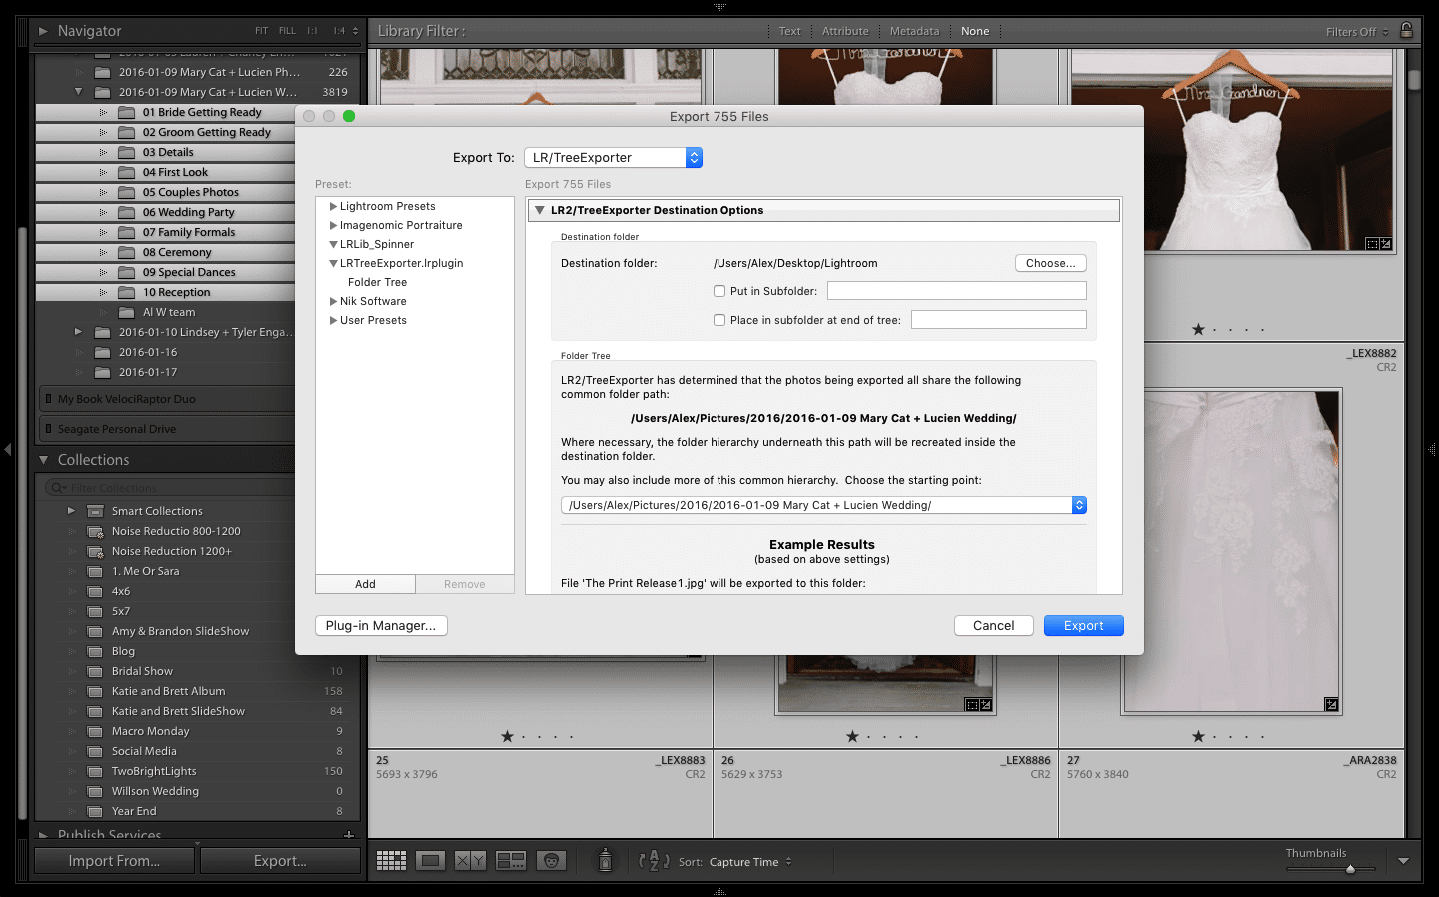
Go and download LR/TreeExporter! You have to donate a few dollars to download it but its well worth the $3 to have this tool. What it does is use the “folder tree” you have set up in Lightroom and exports those folders with your photos.
TIP: When exporting your files to give to your client, set the file name to “Custom Name – Original File Number” This way you can rename the files to something pretty for your clients like “Mary Cat + Lucien Wedding” and then you also have the original file number to reference in case you ever need to reference the RAW file again, you’ll know exactly which one to pull.
If you want to download our folder template you can do that HERE. Just save to your desktop and make sure to copy and paste to your Keepers folder.
Be sure to like us on Facebook. Our next blog will be on Archiving Raw photos.


2 Comments
I’m a huge PhotoMechanic fan, as well, but I had never heard of this TreeExporter. Can’t wait to try it!
I think you need to give me an entire tutorial on Lightroom. There are so many things I’m not using…wow!